How to Hang Pictures
When it comes to decorating – what’s your style? Do you like modern? Classic? Farmhouse? No matter what your interior design style, you’ll most likely need to hang pictures or artwork on your walls.
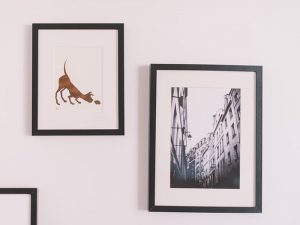
You may have been in some homes where the artwork looks good and thought to yourself, “Wow! I wonder what the secret is to hanging pictures so perfectly?” There truly is no secret, but if you could use a little additional help, use these tips.
 Make Sure You Have the Right Tools: Before you even begin hammering a nail, you want to make sure you have all of your tools assembled. Tape measure, level, hammer, nails, anchors, screws, a step stool, and anything else you may need should be readily available to you.
 - Don’t Just Wing It: It can be tempting when you’re hanging just one or two pictures to try and “eyeball” it or “wing it” – but don’t do it. Even when hanging one picture, you need to take some simple measurements and do some planning. After all, you don’t want unnecessary holes in your walls.
- Know What Your Walls Are Made Of: You may think that walls are all the same, but it’s just not true. While most walls are made of drywall, you may also find brick, cement, concrete, or wood. And knowing what material your walls are made of can help determine how you’re going to hang your pictures and what tools you will need.
- Heavy Pictures Need Anchor Screws: While it can be tempting to just hammer a nail into the wall and place your picture, if you have an extremely heavy picture, you’ll need to do more than just that. If you place a large picture on a nail, you could find that soon you create a large hole in your wall and your picture is no longer hanging in the position you originally chose. This is especially true when you’re not hanging a picture on a wall stud. An anchor screw can help distribute the weight of a heavy picture causing less damage to your walls. Be sure you are using one appropriate for the weight of the picture you are hanging as they are rated for various weights.
- Put Your Math Skills to Work: You’ll probably want to do some simple math before you begin. You may want to center your picture over your couch or on a wall – so knowing the lengths of these things can help you to find the midpoint. You may also want to measure the height of your walls so you can make an informed decision as to where you want to place your picture.
- Map It Out: If you are hanging multiple pictures in a grouping, then you definitely need to map it out. Take some time to create templates of your pictures. Old newspapers can be traced and gently tacked to the wall to give you an idea as to what your finished project will look like.
- Don’t Go Too High: One common mistake that people make is hanging their pictures too high on the wall.
The common rule that people suggest is to hang your pictures at “57 inches on center” – which only applies if you are hanging art on an open wall. Most people suggest somewhere between 57” – 60” depending on your taste. This will put it at eye level for most people.
The next time you get ready to hang some new pictures in your place, use these tips so that you can do it right the first time. You can avoid extra holes in your walls and have your pictures hung up in no time at all.